| site search by freefind | advanced |
NOTE: This does not work on the 64 bit machines, not sure if one has the Pro or Ultimate if they can get it to work in the Virtual XP mode but if one can let me know, then the information can be forwarded on. You can use my Conversion Spreadsheet Generator that will do the same for the newer computers, in excel format or here is Libre Office
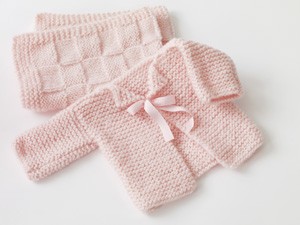
I will be using Baby's First Cardigan from Lion Brand as an example.
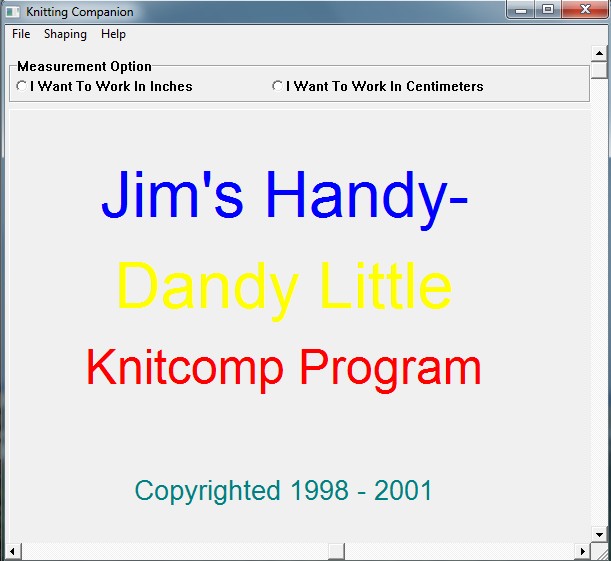
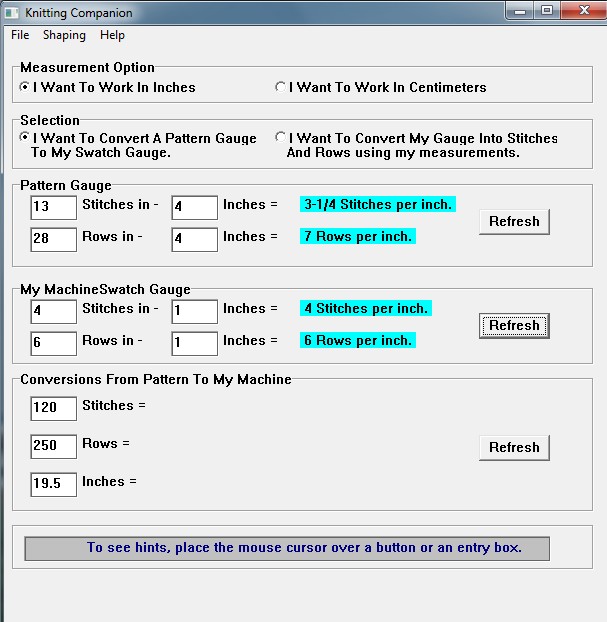
When starting Jim's Knitting Companion, it will look like this. Choose if you want to work
in inches or centimeters.
Then the window will look like this. I will show how to convert a pattern to your gauge.
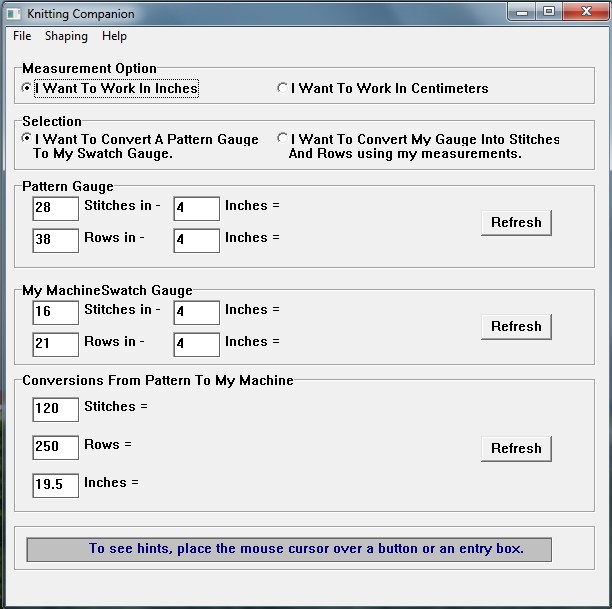
You will take the pattern gauge sts and rows per inch (or 4 inches) and input that to the Pattern Gauge which I underlined in red.
Then you will input your swatch gauge, even if you only measured an inch, just remember to put 1 in the 2nd set of boxes.
Press the Refresh button for both.
Now the original pattern said to Cast On 33 stitches, so put that in the box for stitches and press the Refresh Button to the right of that. The other 2 will refresh also, but your only looking at one step at a time.
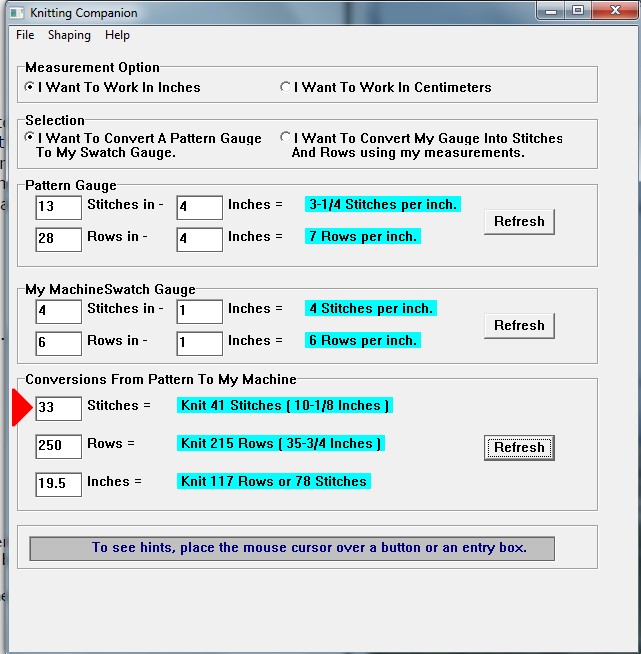
So now my cast on stitches will be 41 sts.
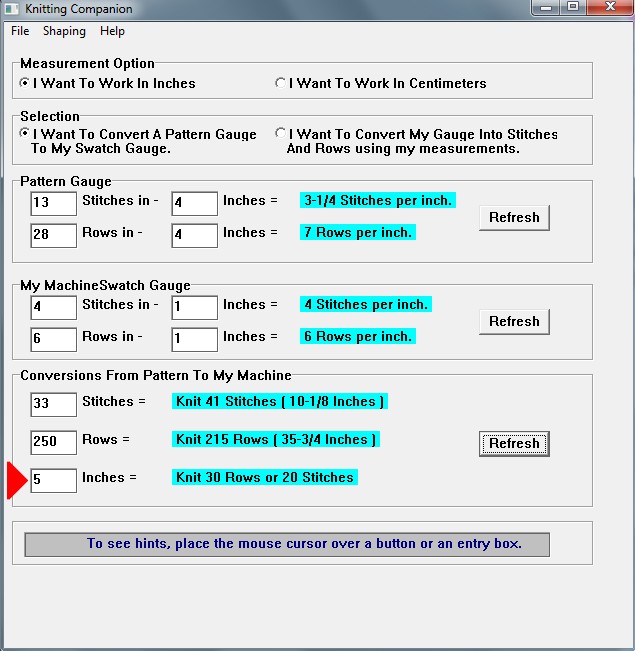
Then I will input 10 in the bottom box for inches.

I will do the same with 5 for the sleeve.
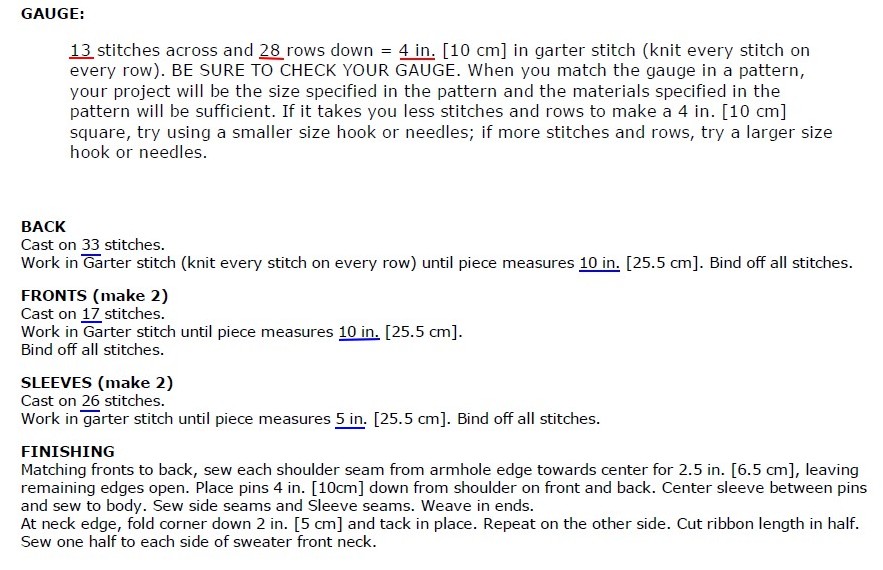
So now my pattern will be as follows:
BACK
Cast on 51 stitches.
Knit until RC 60. Bind off all stitches.
FRONTS (make 2)
Cast on 21 stitches.
Knit until RC 60. Bind off all stitches.
SLEEVES (make 2)
Cast on 32 stitches.
Work until RC 30. Bind off all stitches.
The original was in Garter Stitch which will take longer on the machine, so I did it up as Stockinette Knit.
But it doesn't tell me to do any rib for the bottom of the sweater or the sleeve cuff. So here is more detail to get this done on the machine.
BACK
RC000
Cast on 41 stitches.
Knit 6 rows and reform to 1x1 rib.
Knit until RC 60. Bind off all stitches.
FRONTS (make 2)
RC000
Cast on 21 stitches.
Knit 6 rows and reform to 1x1 rib.
Knit until RC 60. Bind off all stitches.
SLEEVES (make 2)
RC000
Cast on 32 stitches.
Knit 6 rows and reform to 1x1 rib.
Work until RC 30. Bind off all stitches.
As for the fronts and around the neck, one could crochet around them or even do some machine knit trim to help stop the curling.
One could also steam and block it.
Sleeve Shaping
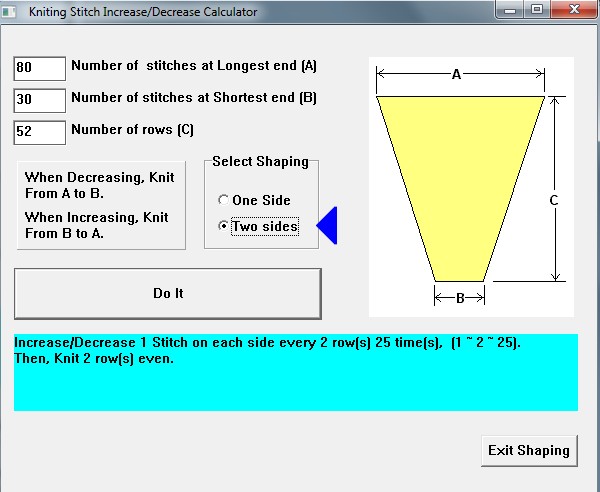
Now if you want to do some shaping on one side or two, then you would click on the Shaping on the Top Menu and then Edge and you will get this window.
You will input what you have for stitches in A and B for the longest and shortest ends. Then you will input the number or rows that you may have got from the previous window of the Companion. Tick for one or two sides that you want to do and click the Do It button.
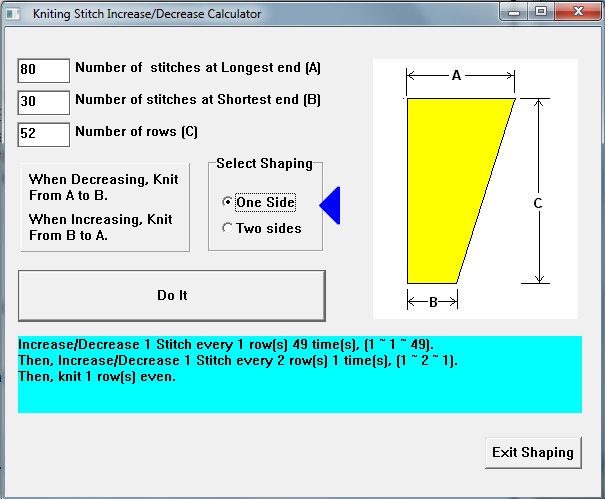
And then in the bottom it will tell you how to increase or decrease for your shapings.
And that is all there is to taking a hand knit pattern and using Jim's Knitting Companion to get your own
pattern for your machine at your gauge.